My Homelab v1.0 – Where I Build, Break, and Learn

Before diving into the details of my homelab, let me give you some context on why I built one in the first place.
Prior to my time as an SRE at Google, my background was entirely in software engineering — topics like computer science, data structures, and algorithms. Whenever I needed to learn something new — a language, framework, or concept — I could just open my humble 8GB RAM laptop and dive in. Whether I was writing toy projects or taking courses on Pluralsight or Treehouse, learning was straightforward and accessible.
That changed overnight when I joined Google as an SRE 😅.
I suddenly found myself in a world filled with unfamiliar terms: iSCSI,
iPXE, Netboot (Wikipedia,
Arch guide),
and countless other tools and concepts I’d never encountered. On top of that, I had to
learn how Google’s internal infrastructure worked — which was a world of its own. My
usual strategy of “just code it and figure it out” no longer worked. I didn’t have a clear
sandbox in which to experiment — and my laptop just wasn’t cutting it anymore.
That’s when I discovered the concept of a homelab — and it felt like the perfect way to bridge the gap between theory and hands-on infrastructure work. It gave me a tangible way to explore infrastructure, test ideas, simulate real-world environments, and — most importantly — learn by doing.
The Homelab Stack: Hardware & Setup
Introduction
Here’s a breakdown of the gear powering my homelab — and the reasoning behind each choice. For all the machines I built, I decided to go with the AMD AM4 platform due to its affordability compared to the newly released AM5 platform at the time.
Network Setup
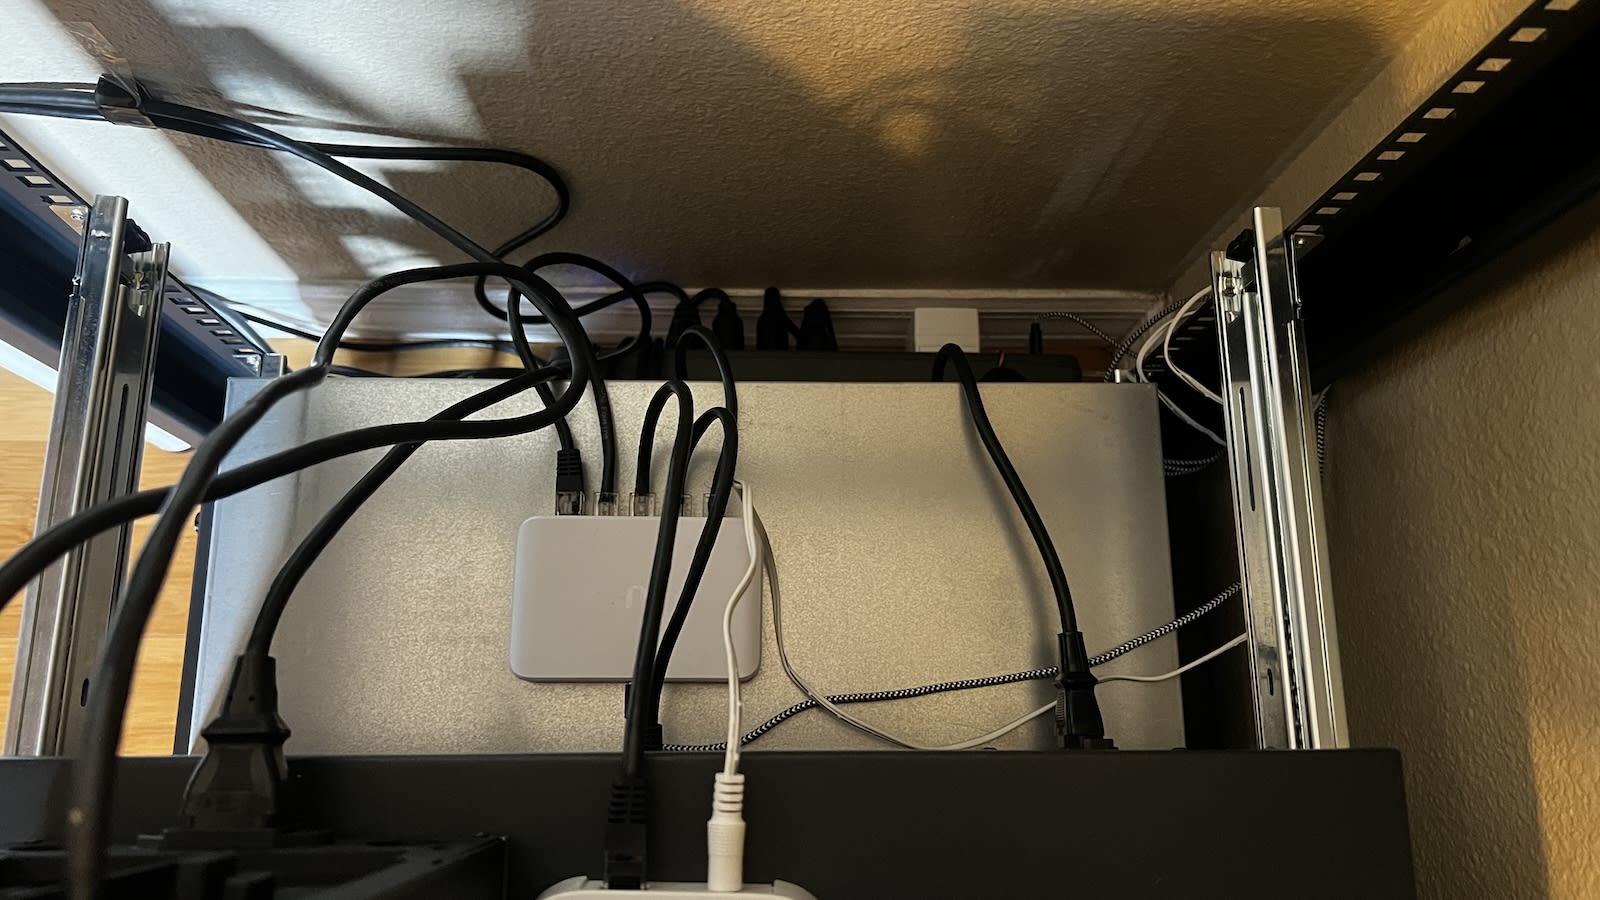
Before diving into the individual machines, here's a quick look at how the homelab network is currently wired. At the core of the homelab is a simple but reliable UniFi Flex Mini, which gives each device in the rack a direct Ethernet connection. I’ll soon be replacing it with the newly released UniFi Flex Mini 2.5G to take better advantage of devices with 2.5GbE NICs.
To give the cabling a cleaner, more organized look, I decided to cut Ethernet cables to length myself as an experiment. I used a Klein Tools Pass-Thru Crimper and some Pass-Thru Data Plugs. The process worked well, but I quickly realized that aligning and crimping the wires is incredibly tedious and time-consuming. In the future, I’ll probably stick with high-quality pre-made patch cables — the time saved is worth the tradeoff.
At this point, I haven’t set up any VLANs or advanced network segmentation — mostly because
I don’t have a router that supports it. That said, experimenting with VLANs is definitely
on my radar. I’m weighing whether to get a
UniFi Dream Router 7 for tight UniFi
integration, or build a pfSense box for deeper hands-on
learning and flexibility.
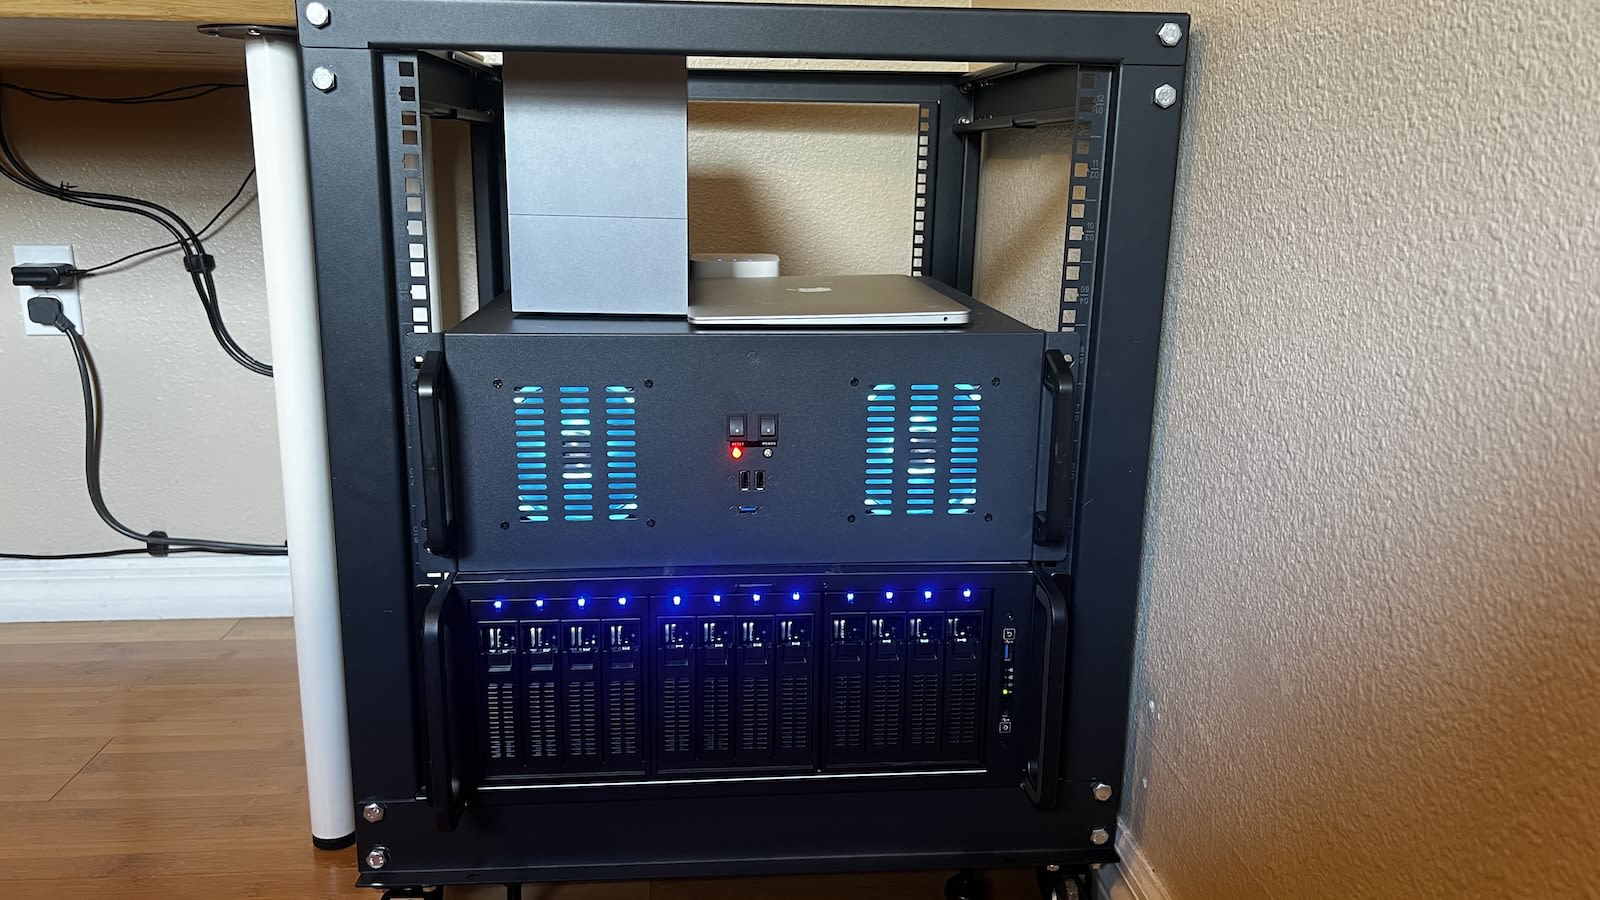
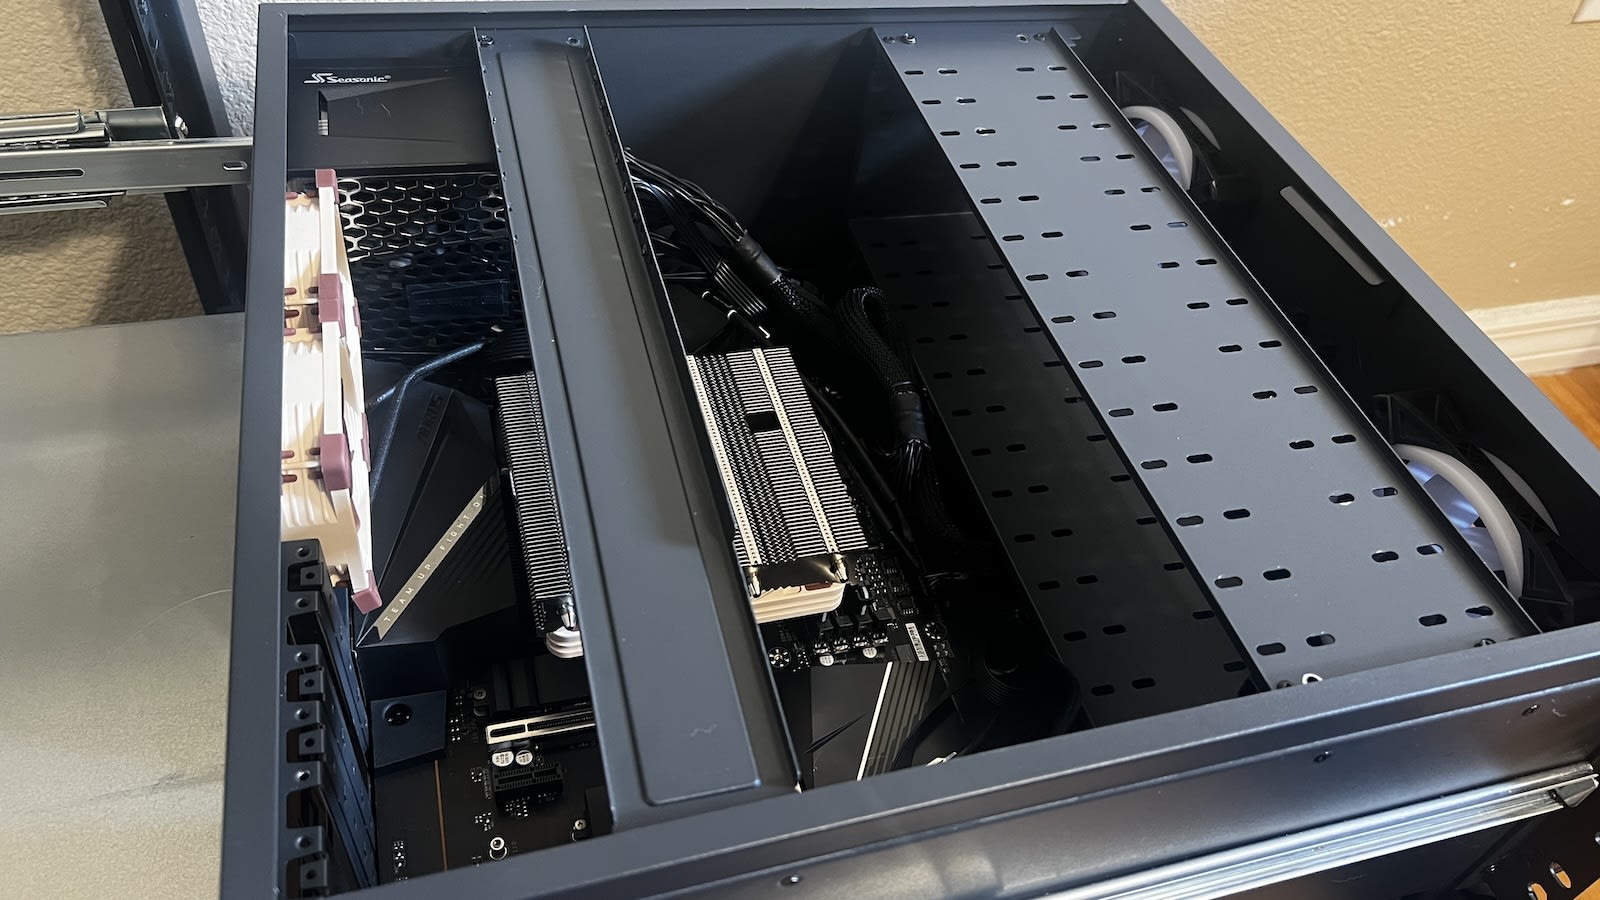
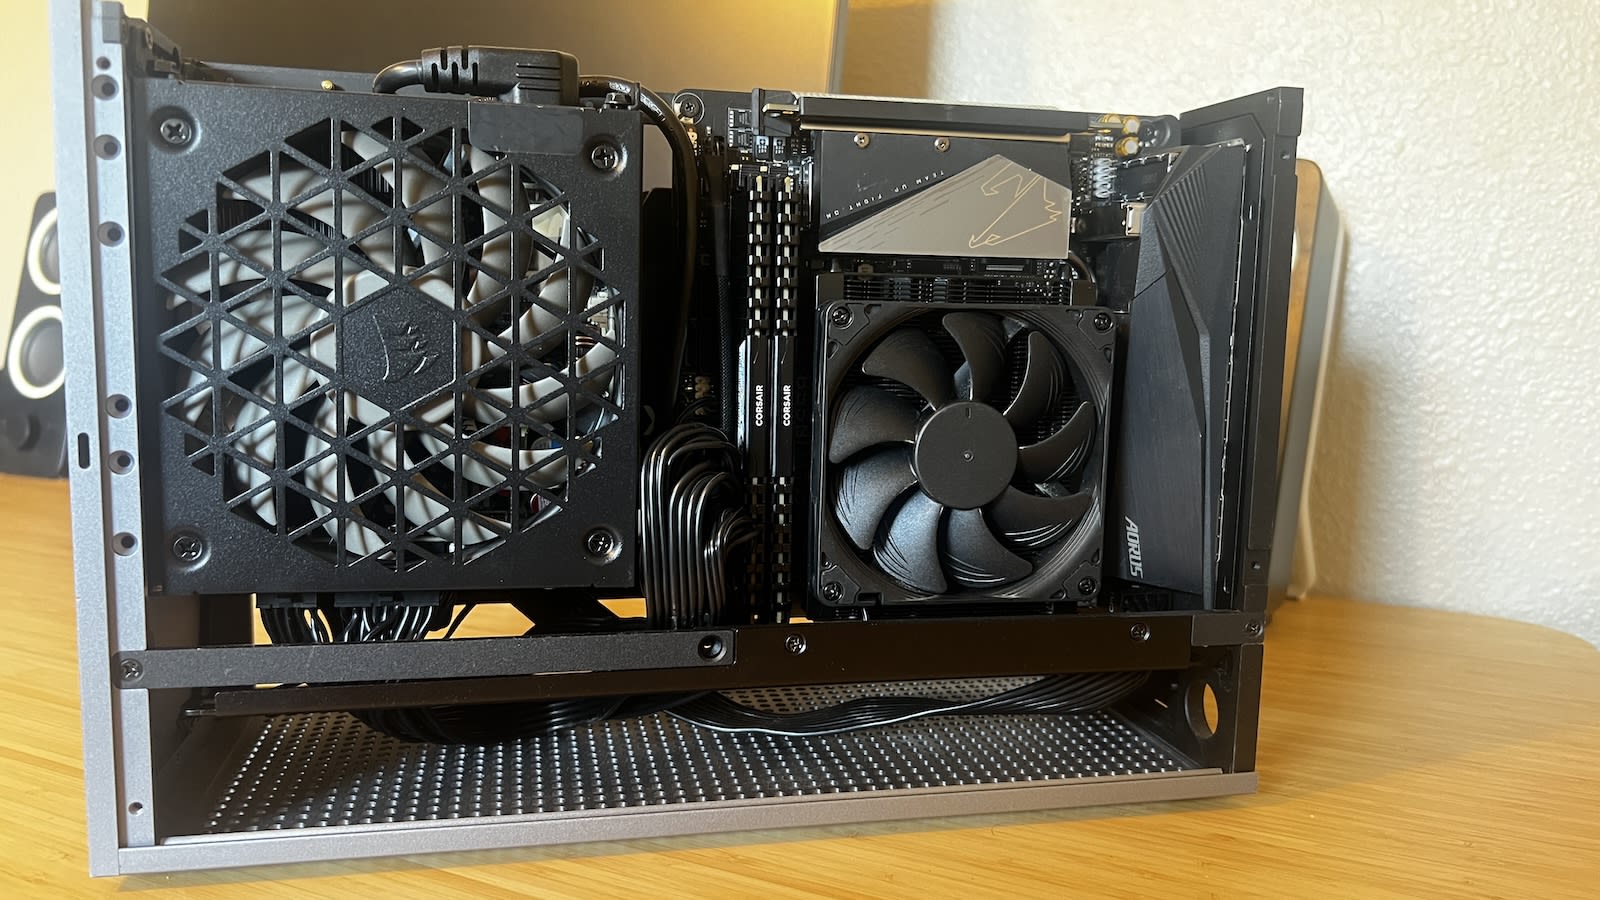
Proxmox Server (Compute)
-
Motherboard: Gigabyte B550 AORUS PRO AC
-
Storage: 1TB Samsung 980 PRO NVMe (M.2) — boot and VM datastore
-
Network: Integrated 2.5GbE NIC
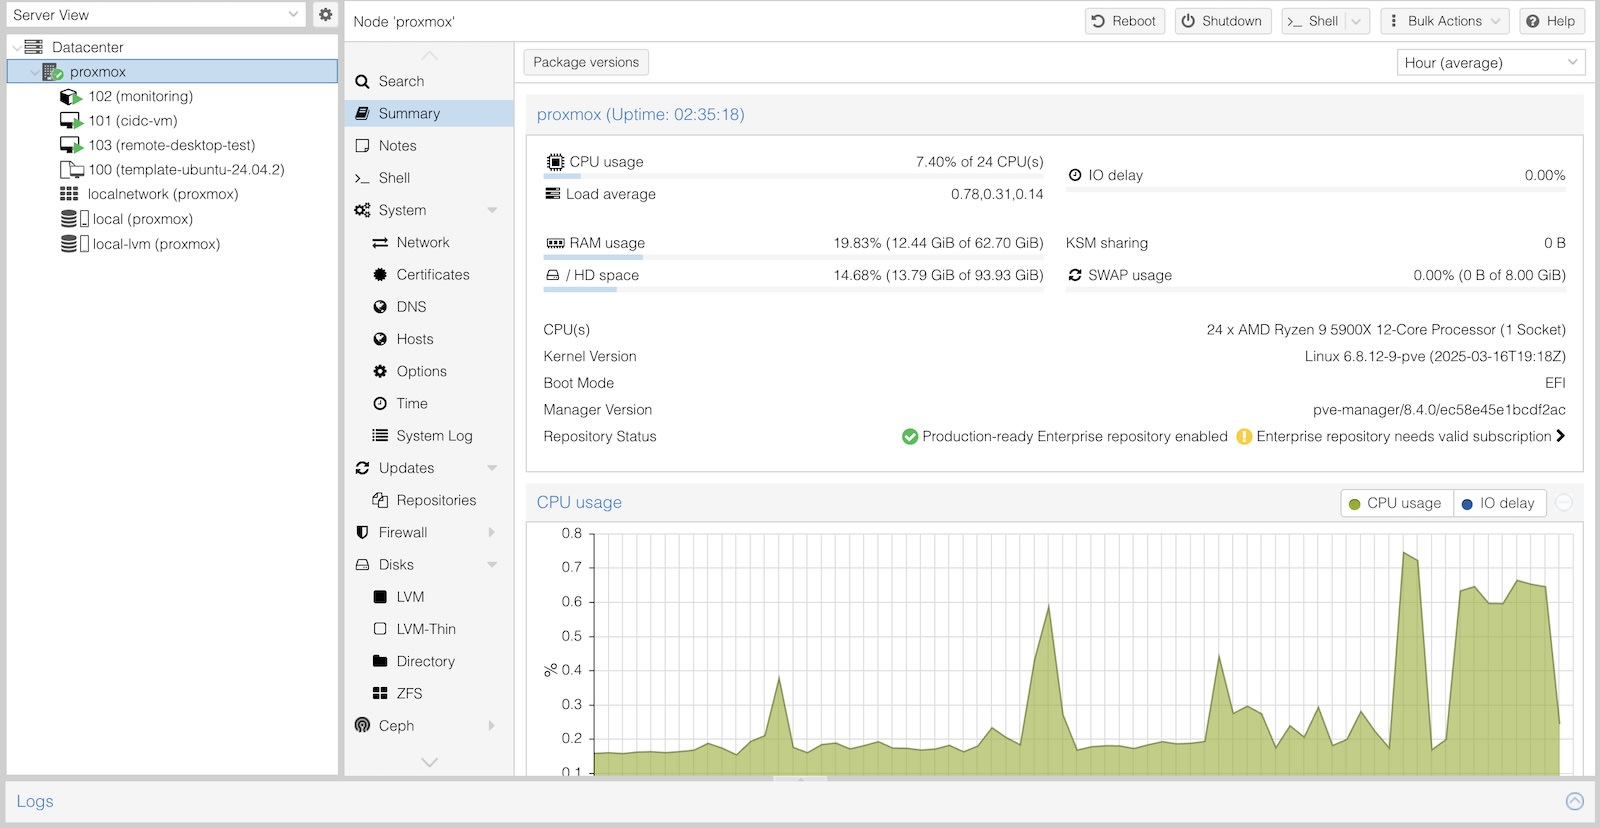
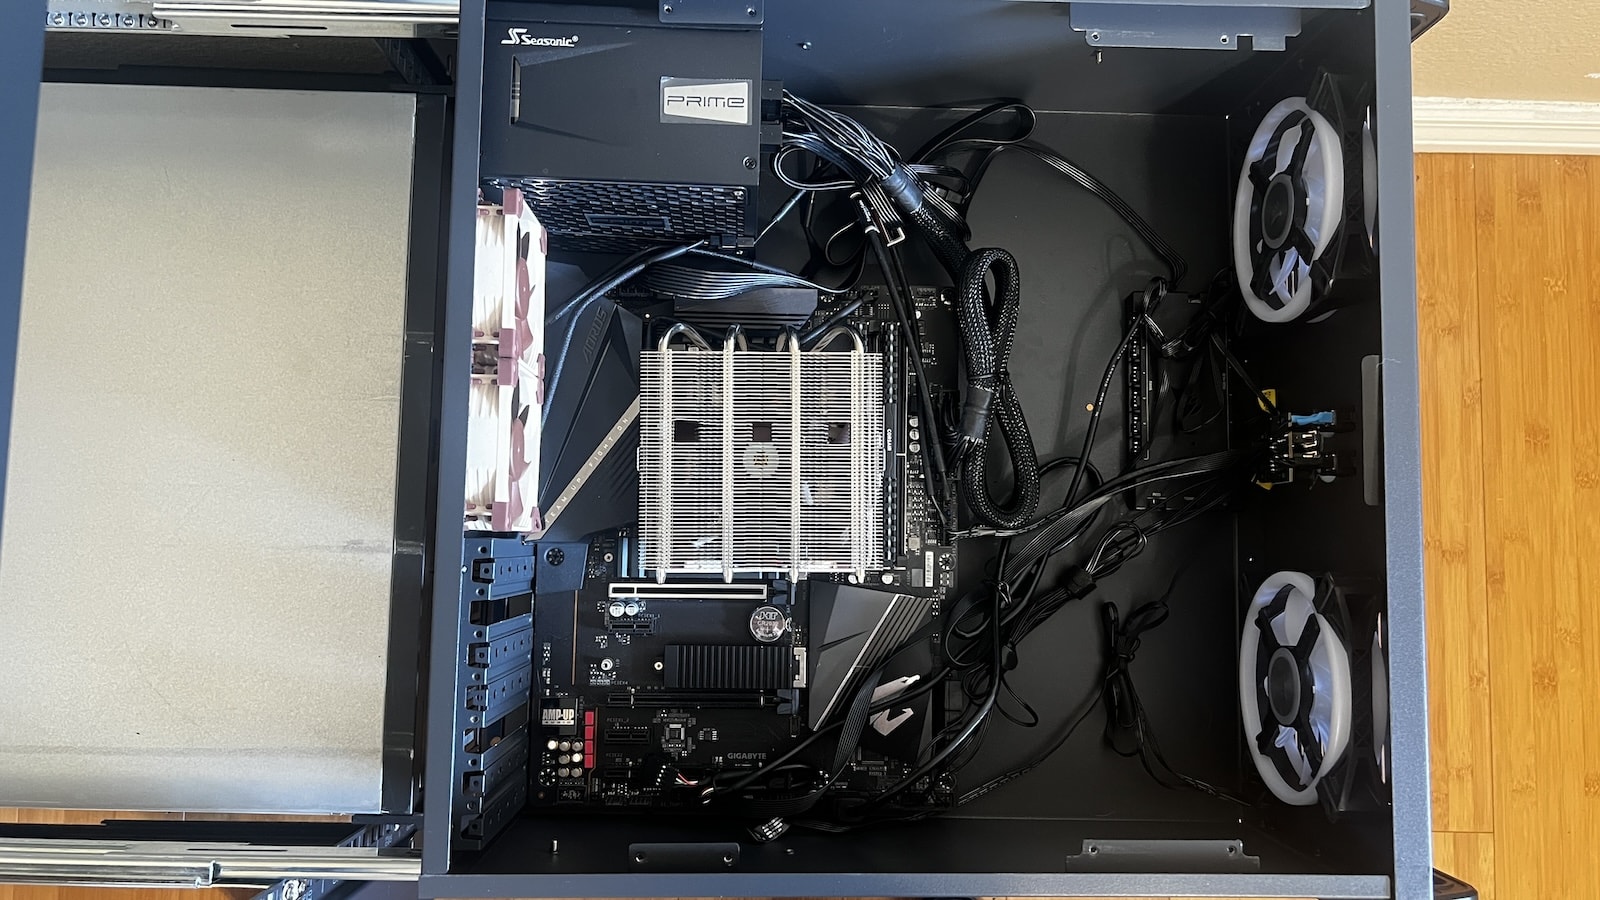
This is the main workhorse of my lab. I run Proxmox VE
on bare metal for managing virtual machines and containers. The 5900X gives me
plenty of cores to work with, and the 64GB RAM allows me to spin up multiple VMs
for development, CI/CD runners, and infrastructure experiments.
I chose Proxmox as my hypervisor because it's simple to set up, yet feature-rich —
offering enterprise-level capabilities despite being free and open source. It's a fan
favorite in the homelab community for good reason: powerful, efficient, and straightforward.
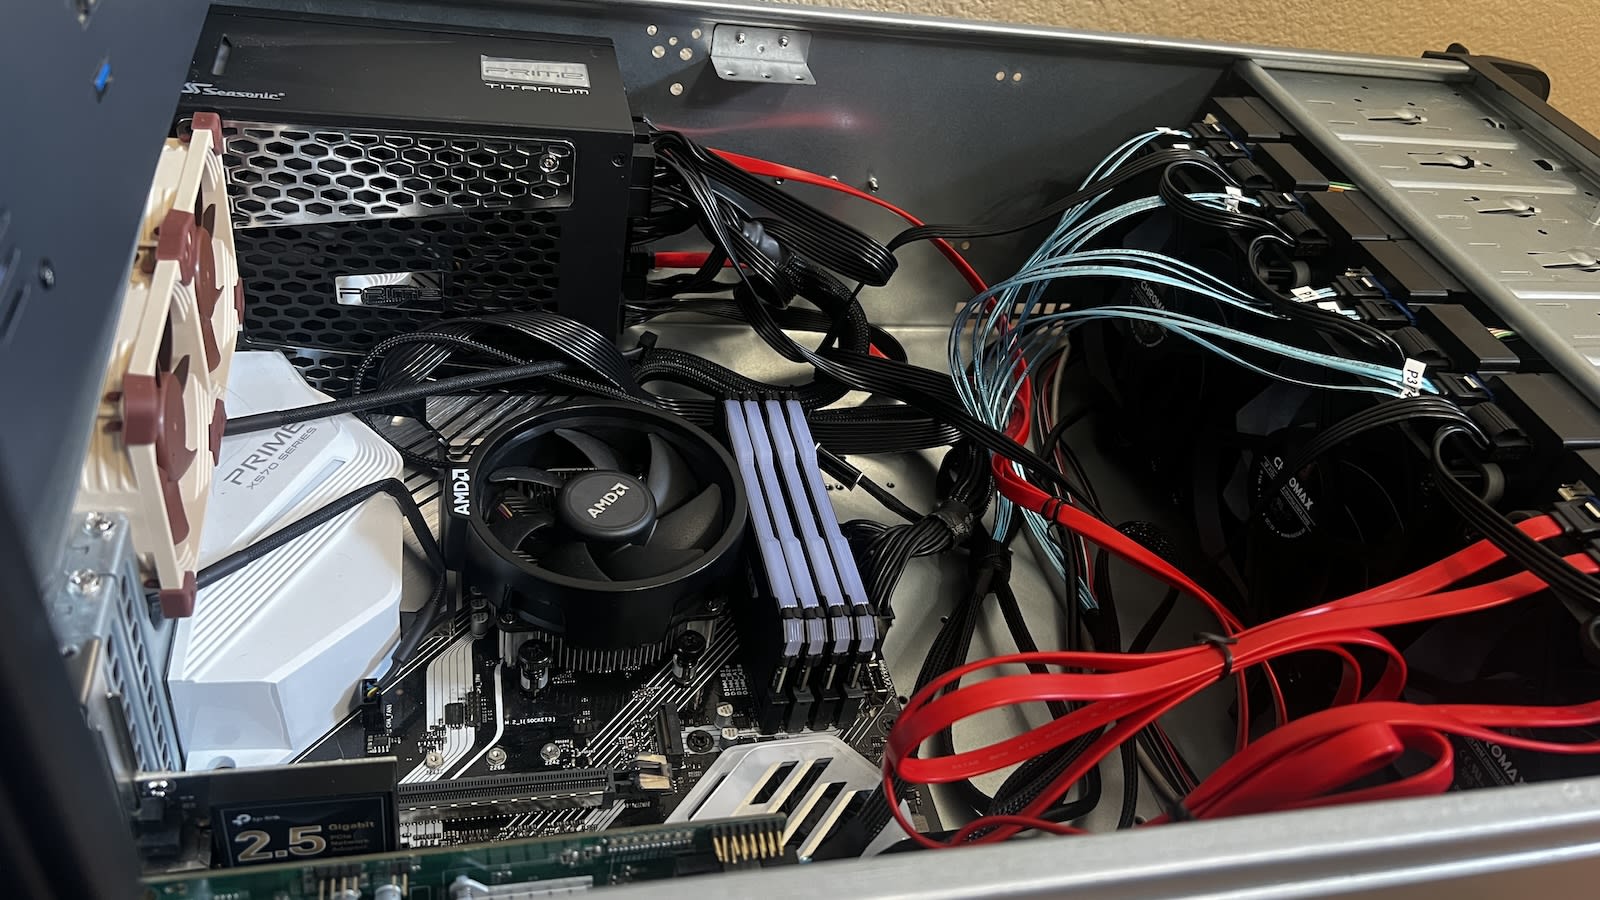
TrueNAS Scale Server (Storage)
-
RAM: 32GB DDR4 - Corsair VENGEANCE RGB PRO 3200MHz C16 (4×8GB)
-
Motherboard: Asus PRIME X570-PRO
-
Boot Drive: 128GB SanDisk Z400s 2.5”
-
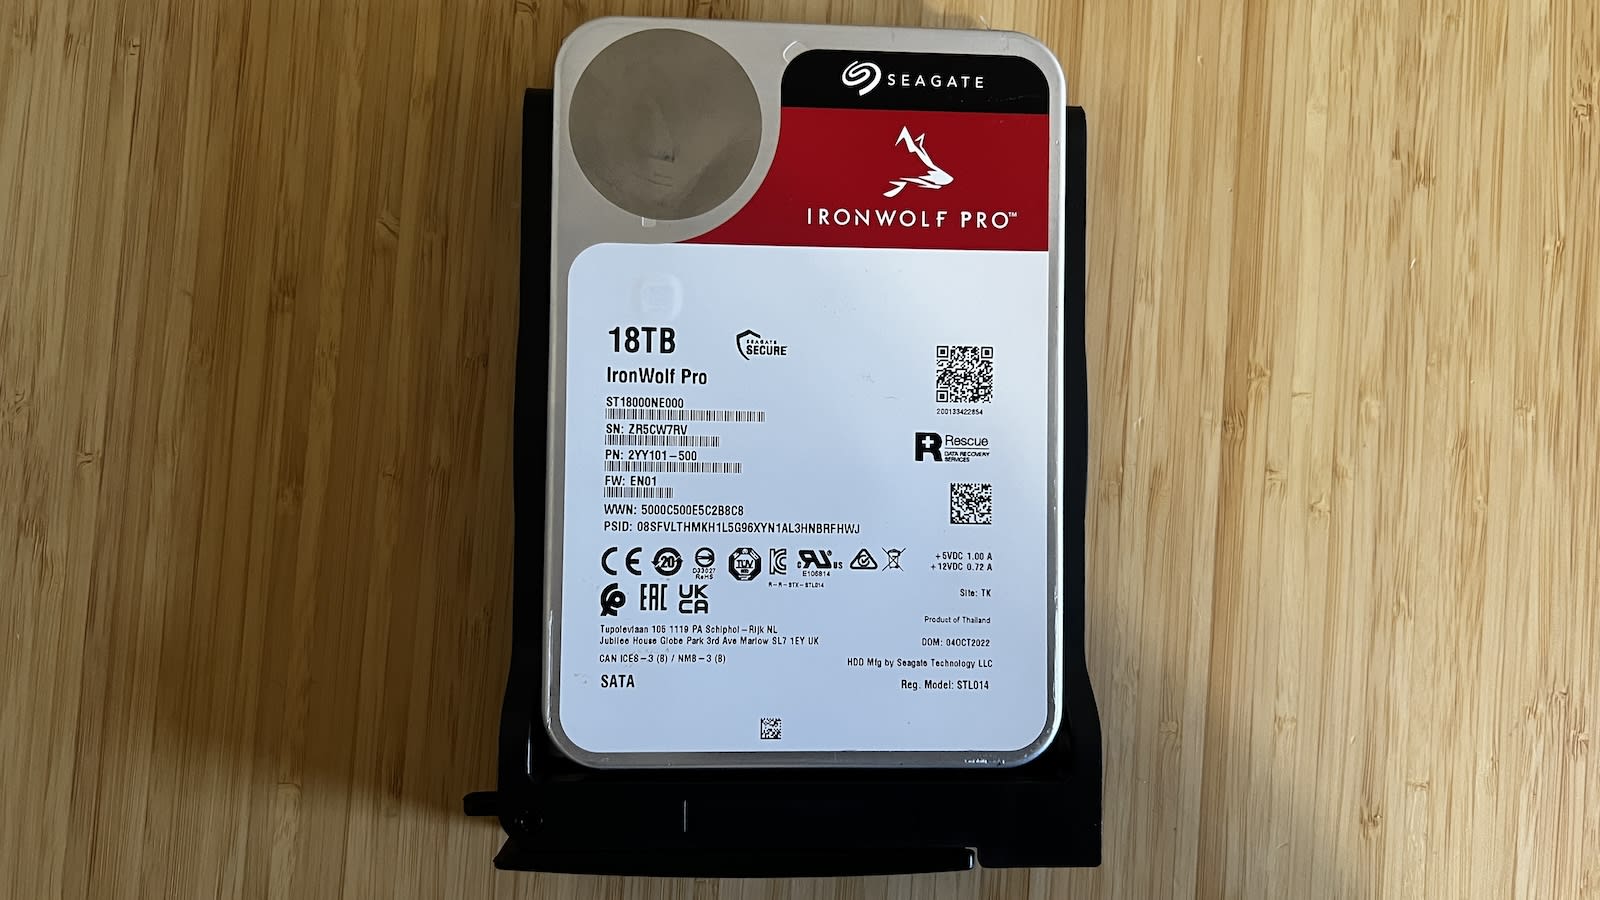
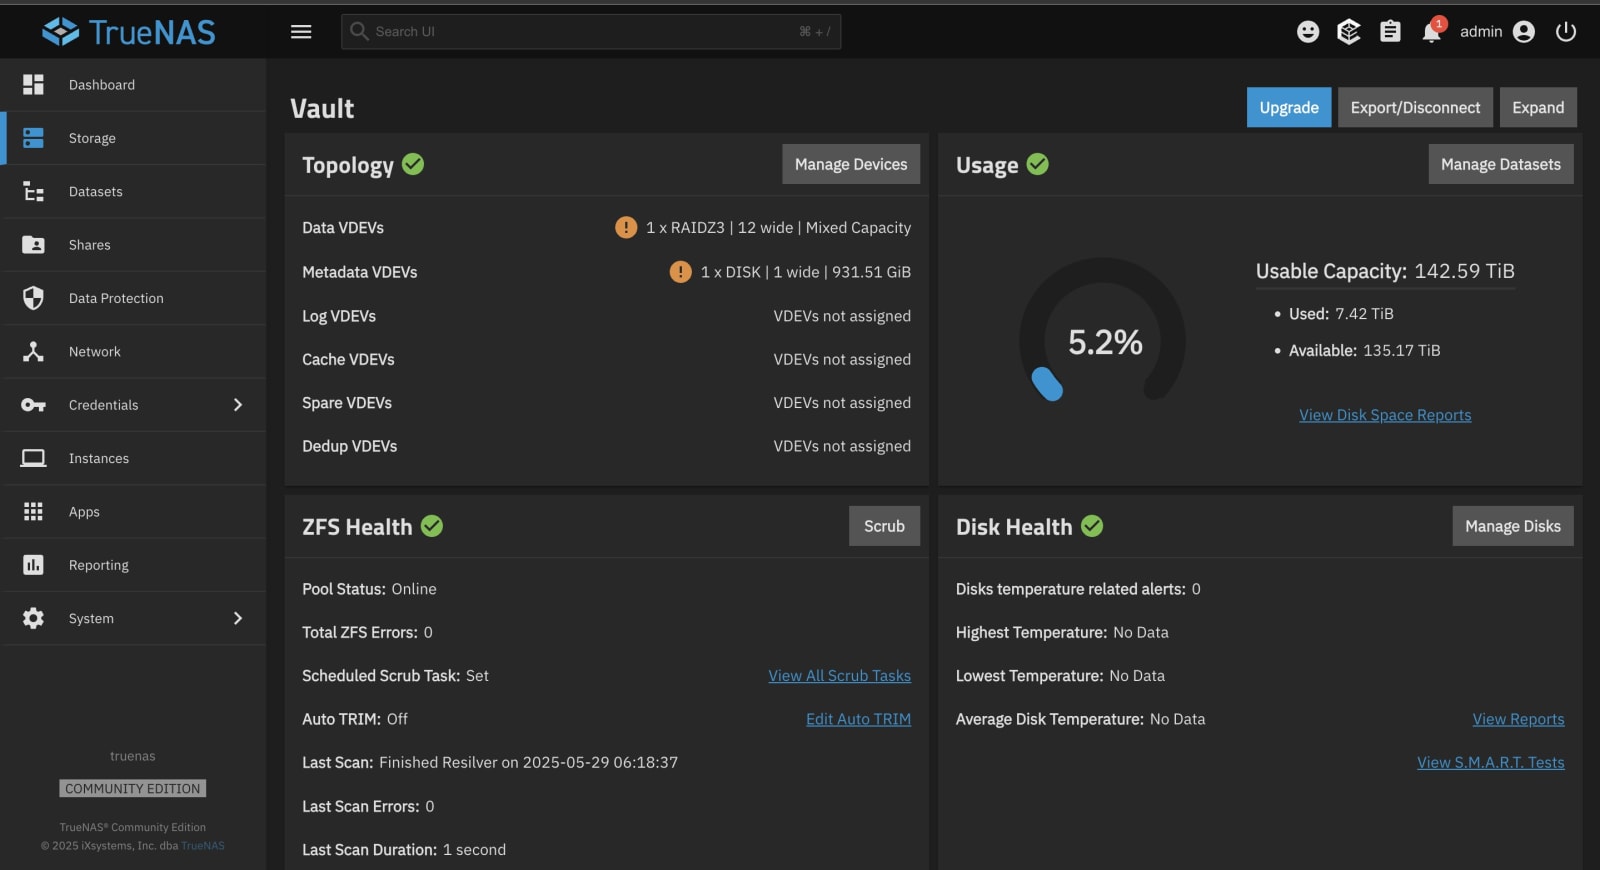
Storage Pool:
Qty Product vDev 11x 18TB Seagate IronWolf Pro Data vDev 1x 20TB Seagate IronWolf Pro Data vDev 1x 1TB Samsung 870 EVO Metadata vDev -
App Pool: 1TB Samsung 980 PRO NVMe (M.2)
-
HBA (SAS Controller): LSI 9211-8i 6Gbps SAS/SATA HBA (Flashed to IT Mode)
-
8-port internal HBA (2×SFF-8087)
-
PCIe 2.0 x8 interface
-
Supports up to 256 SATA/SAS drives
-
Ideal for
ZFSwith direct disk passthrough
-
-
Network:
- Integrated 1GbE NIC
- TP-Link TX201 2.5GbE NIC
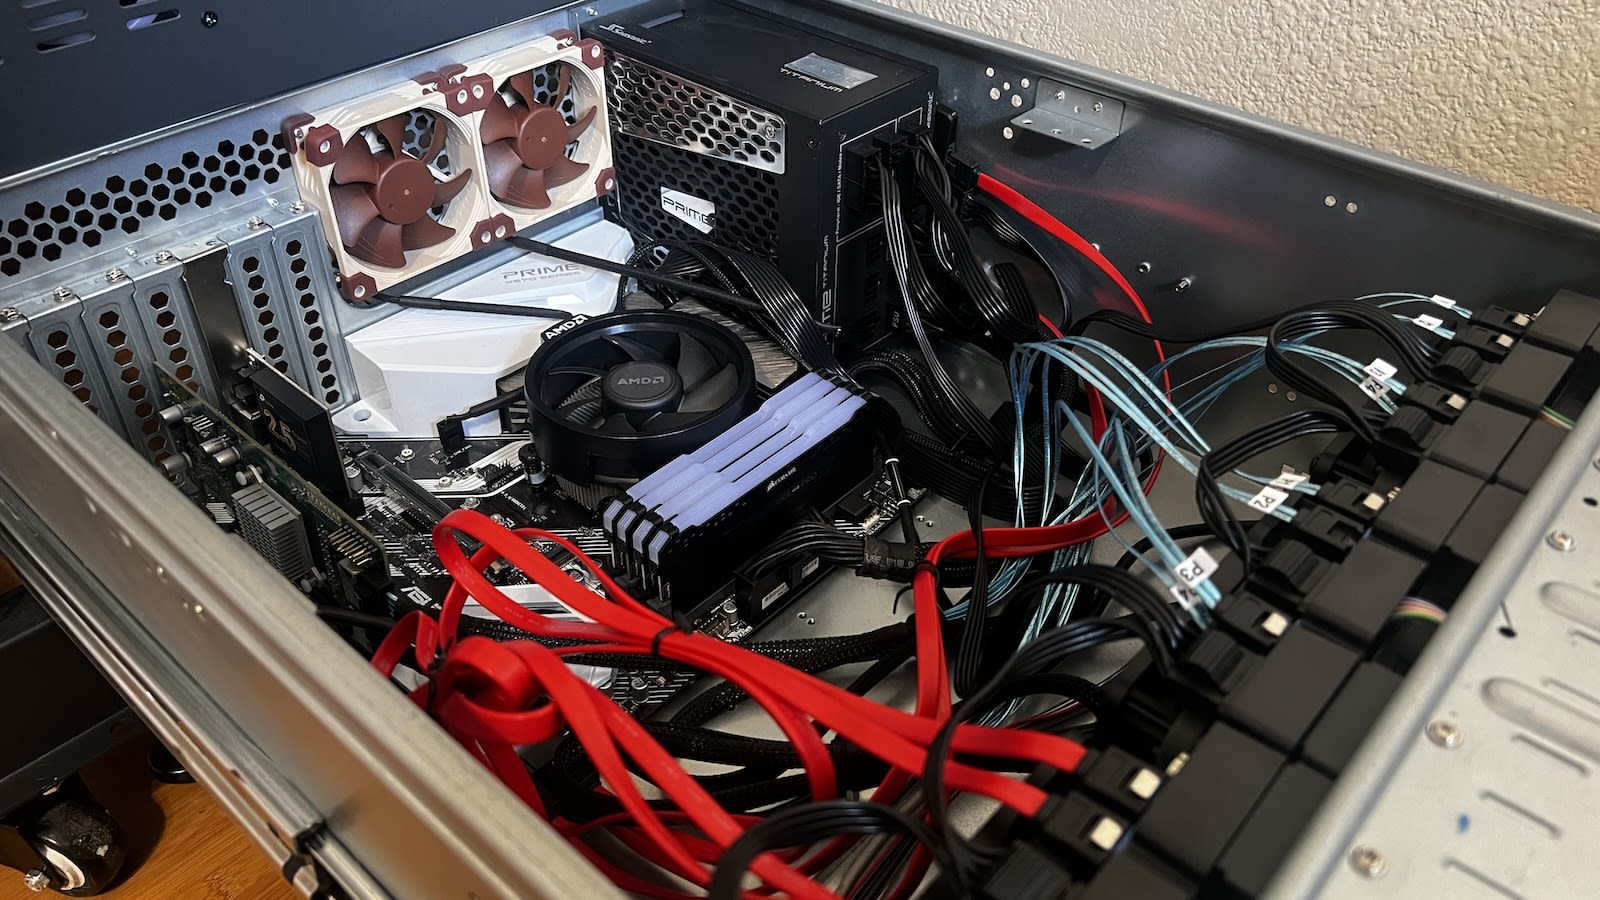
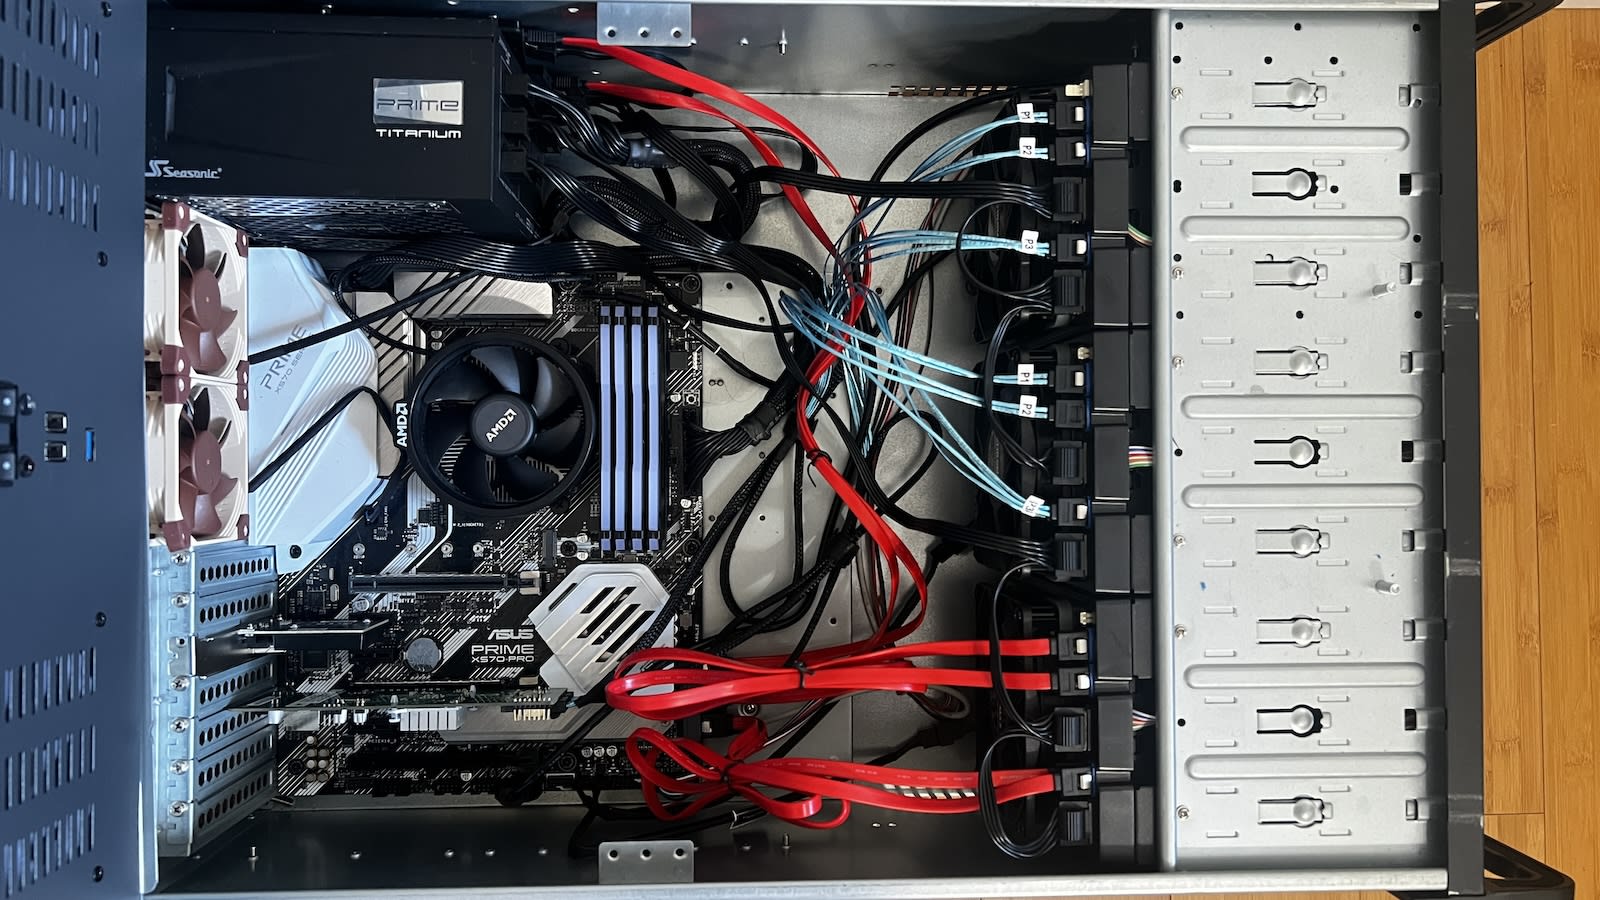
This beast of a unit is my primary storage and backup server, and I’ll admit — I may have gotten a little carried away 😅.
Let me give you some context on how this server came to be. Not long before I even knew what a homelab was, I was gifted one of those 18TB HDDs for my birthday. Once I discovered TrueNAS and what a homelab could do, I decided to build a NAS to centralize all my data and add some redundancy.
Initially, I intended to combine the Proxmox and TrueNAS servers into
a single machine. But after learning that it's generally recommended to split
compute and storage into separate servers, I chose to start with TrueNAS.
The server started out very simple — just three HDDs, set up on a cheap test bench
I got from Newegg and a 3D-printed HDD holder
from eBay. Since then, it’s been a journey of learning, testing, and experimenting — with
both the software and a variety of hardware configurations.
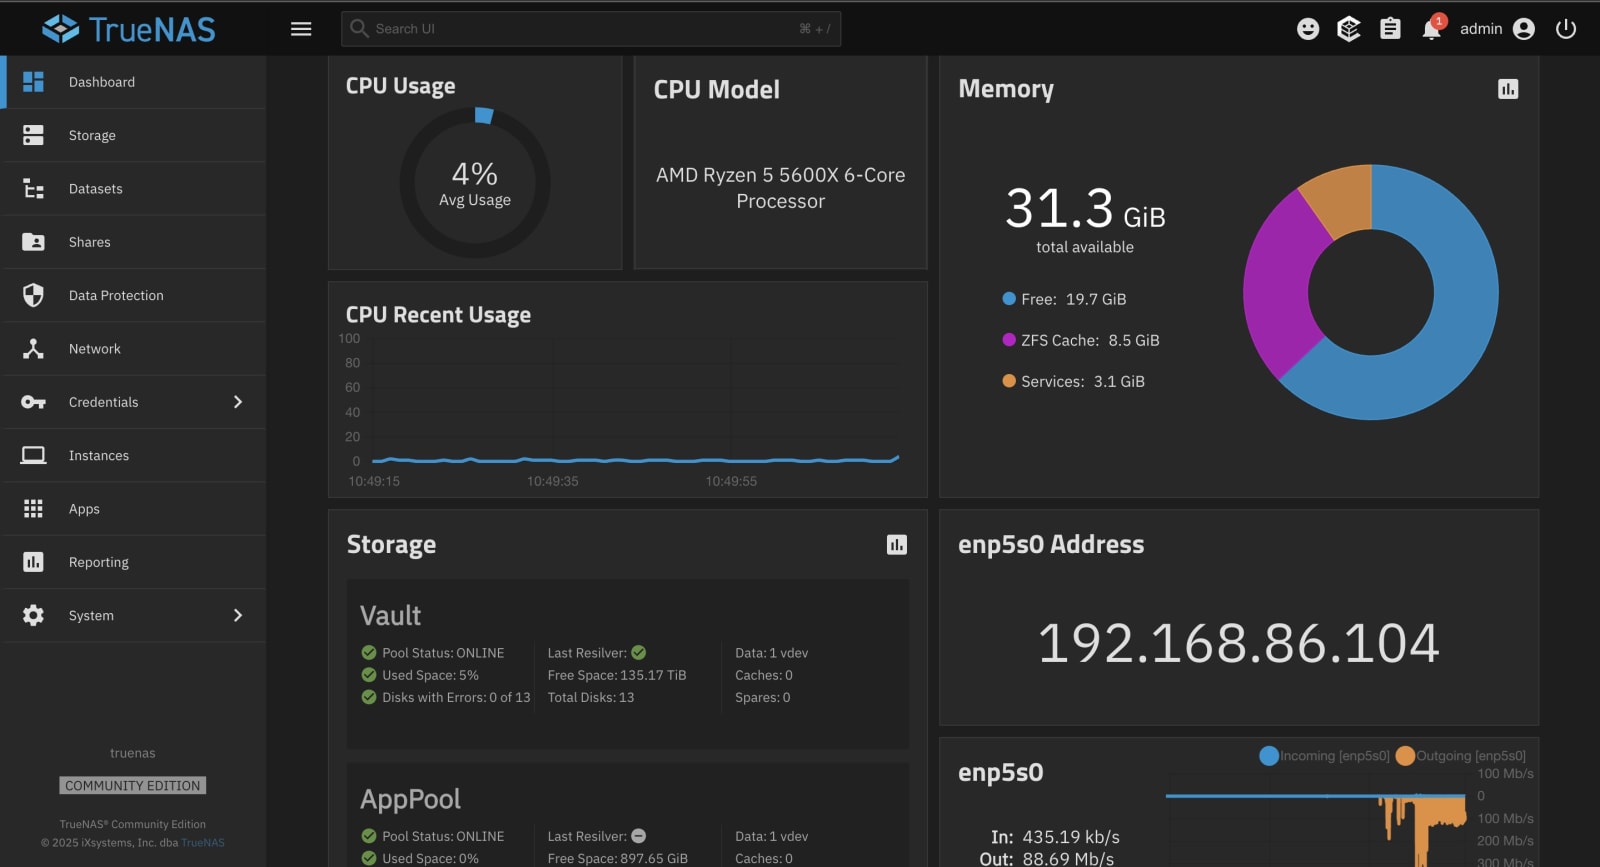
Currently, I use TrueNAS SCALE — the
Linux-based version of TrueNAS. I chose it over CORE
because I’m more familiar with Linux, and the experience aligns better with tools and
environments used in the industry.
I use it for:
ZFS-based storage- Snapshots
- Block sharing
The storage is configured as:
-
1 x Data vDev with 11 × 18TB HDDs & 1 x 20TB HDD in
RAID-Z3.
The reason why the data vDev has mixed HDDs, is solely because I had to replace a dead drive and I had a few 20TB HDDs that I had previously bought on sale. -
1 x Metadata vDev with a 1TB SSD in Stripe.
This helps speed up the pool by offloading metadata operations — things like file lookups, directory listings, and permission checks — to a much faster SSD. Since apps likeFilebrowserandJellyfinconstantly crawl through folders and scan tons of media files, this setup makes their UI feel snappier and more responsive. It also helps with backups that contain lots of small files, making it quicker to browse, verify, or restore from them. It’s not a game-changer for raw throughput, but for anything that needs to quickly index or traverse a large number of files, it really helps.
The server is set up to expose storage over SMB
and iSCSI, which integrate cleanly with:
ProxmoxWindows 11 PromacOS- Any future self-hosted services
I also have Filebrowser and Jellyfin running as applications directly on the server.
These are highly data-centric apps that mostly act as frontends for files already stored
on TrueNAS. Running them as TrueNAS apps instead of on the Proxmox side helps reduce
complexity, improve performance, and keep things clean and efficient.
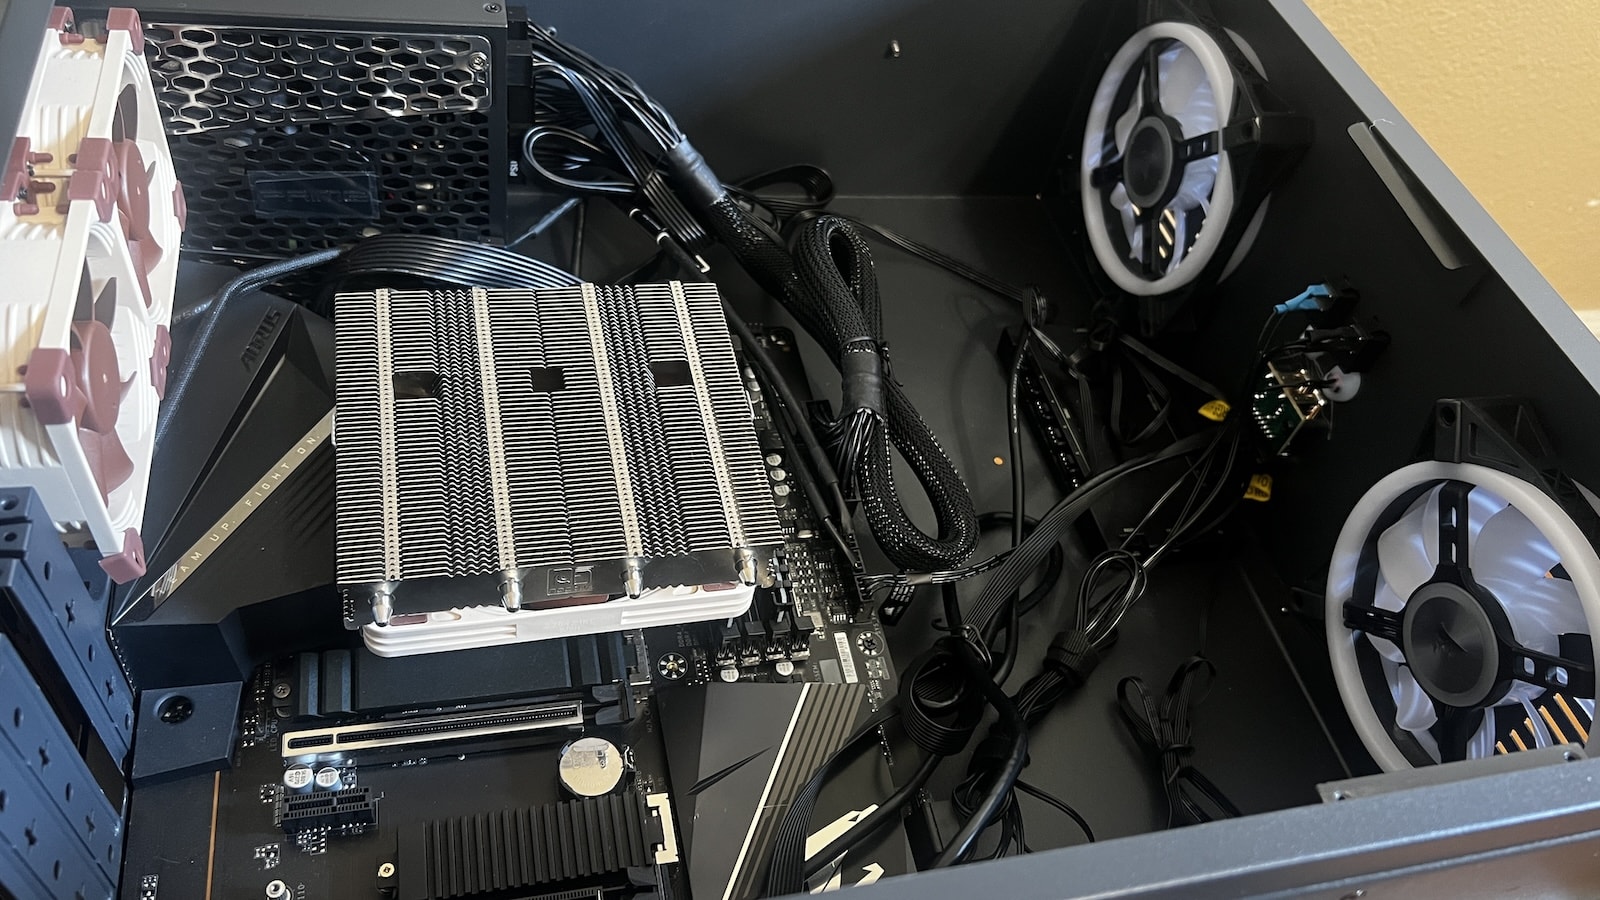
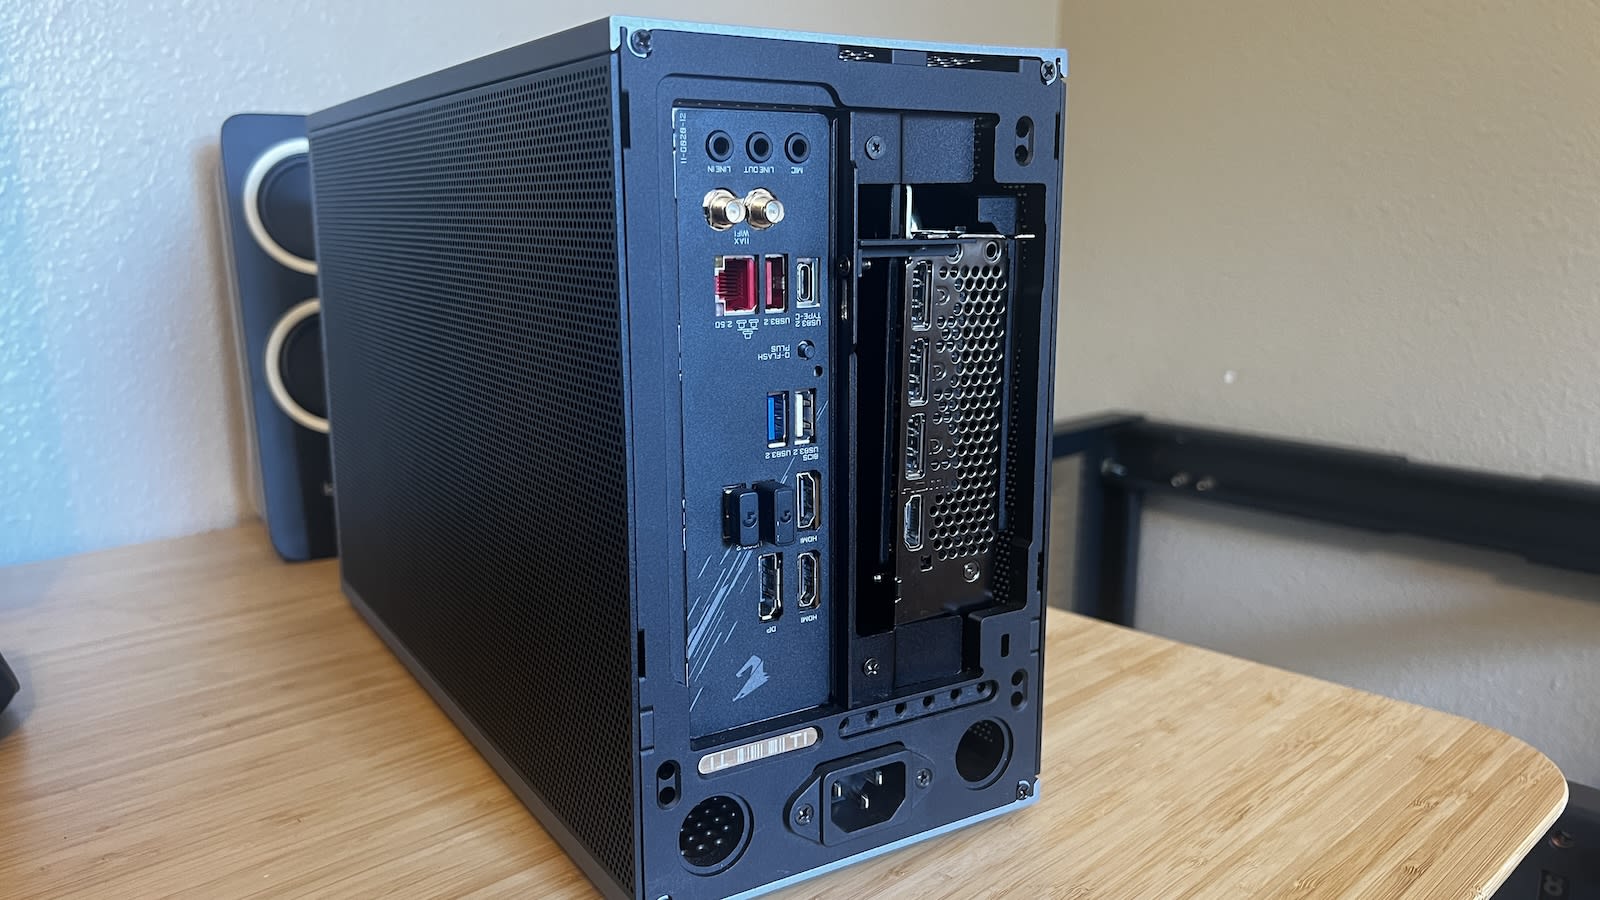
Mini-ITX Gaming PC (Optional/Test Bench)
-
GPU: MSI RTX 3070 (LHR)
-
Motherboard: Gigabyte B550I AORUS PRO AX (Mini-ITX)
-
Storage: 2TB Samsung 980 PRO NVMe (M.2)
-
Network: Integrated 2.5GbE NIC
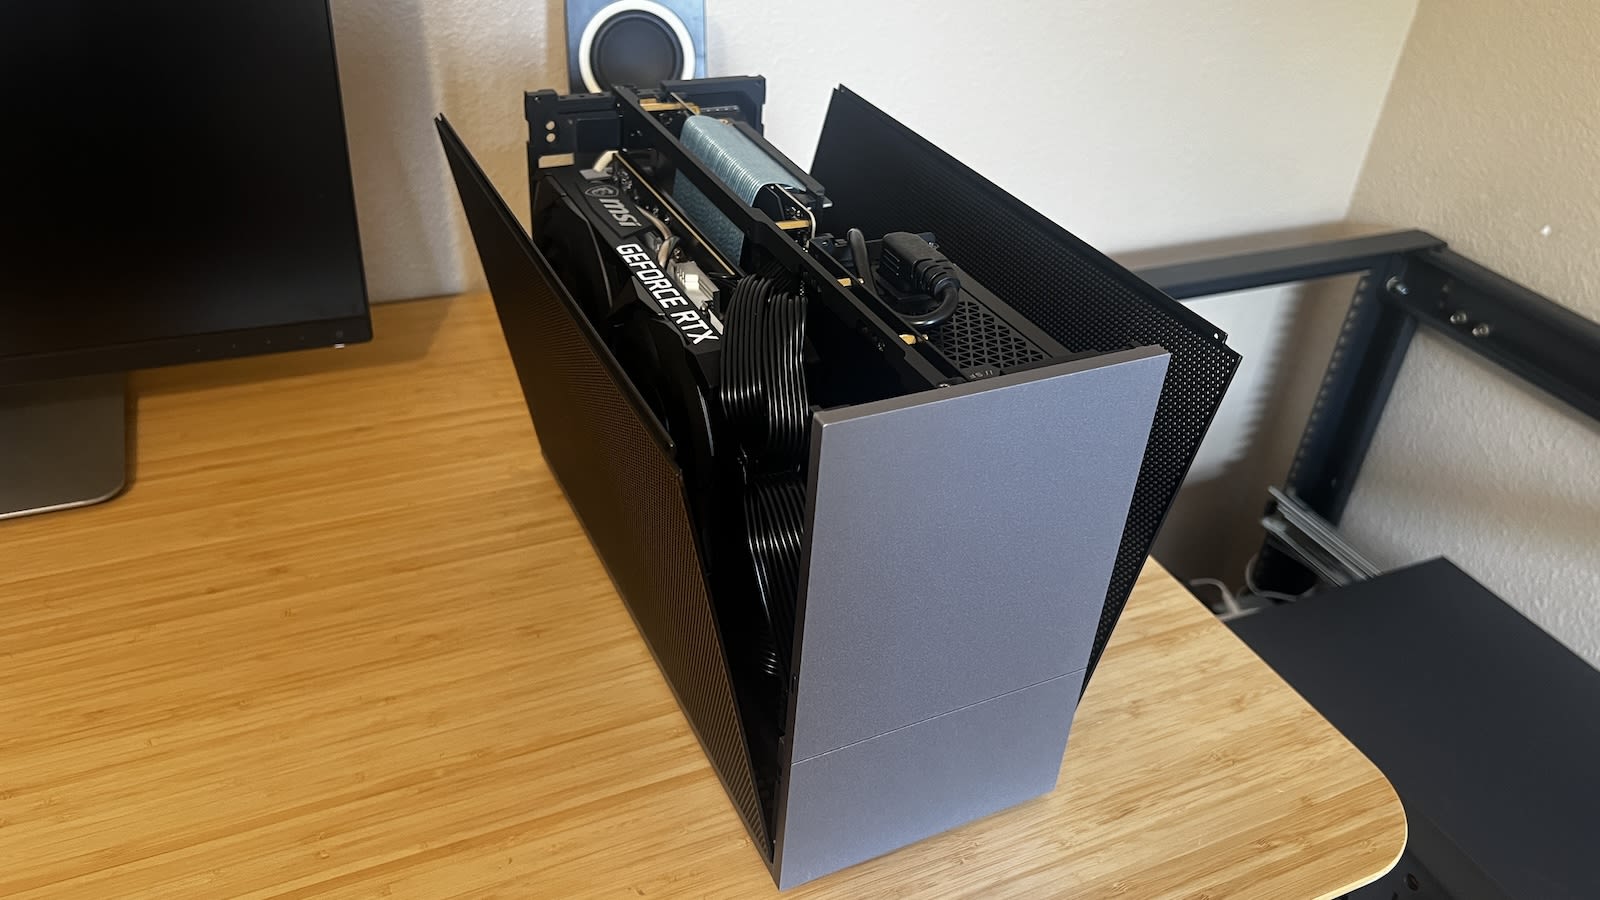
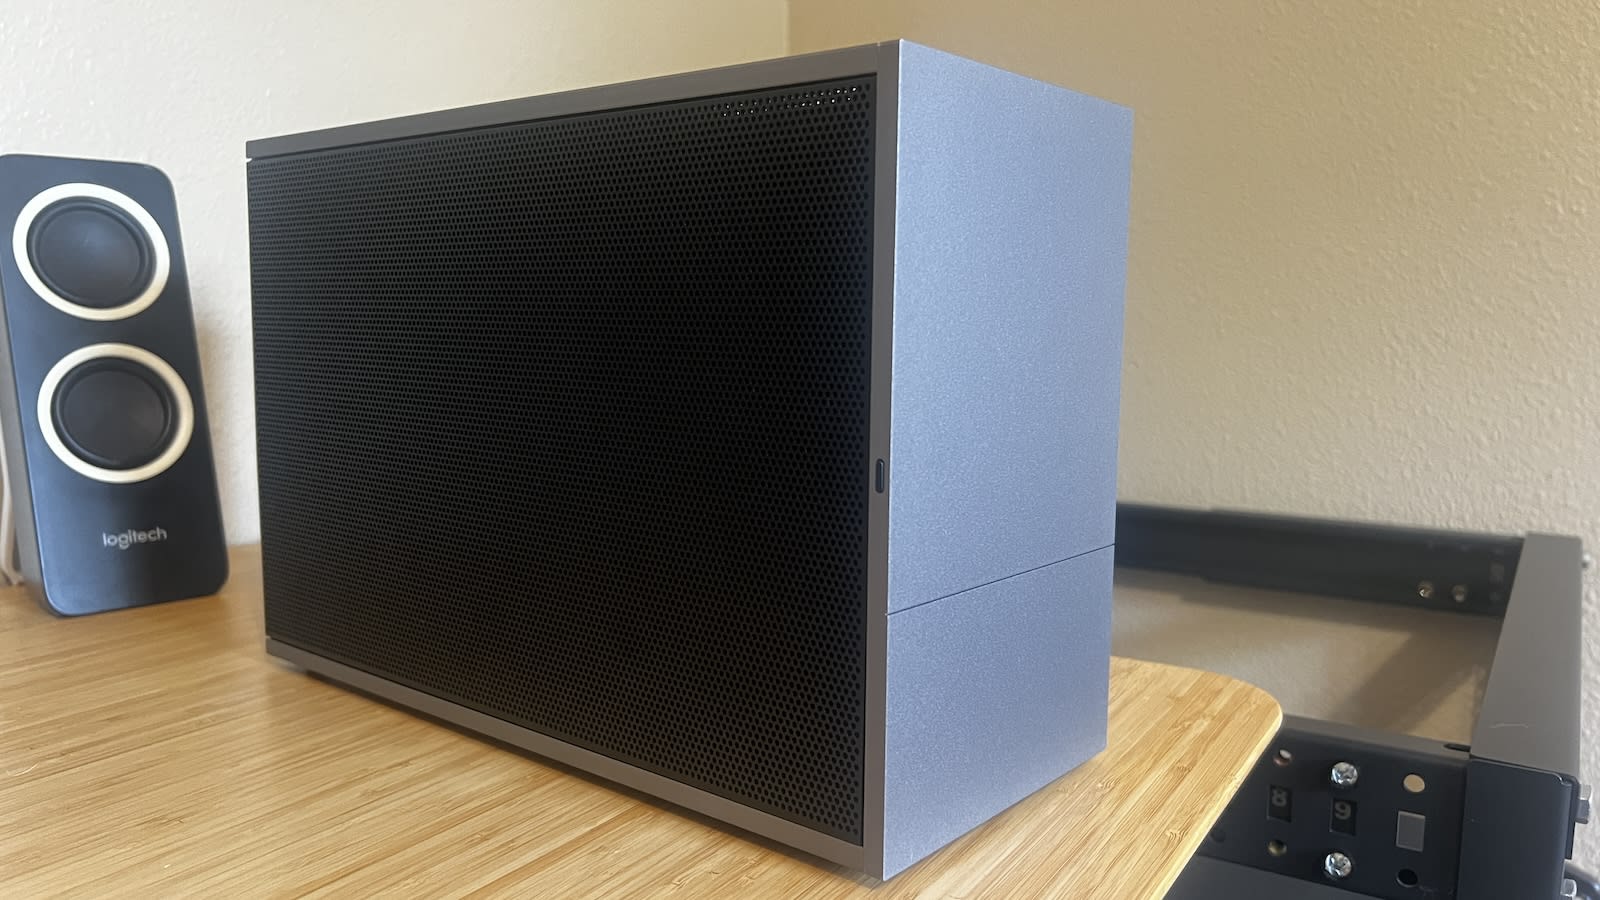
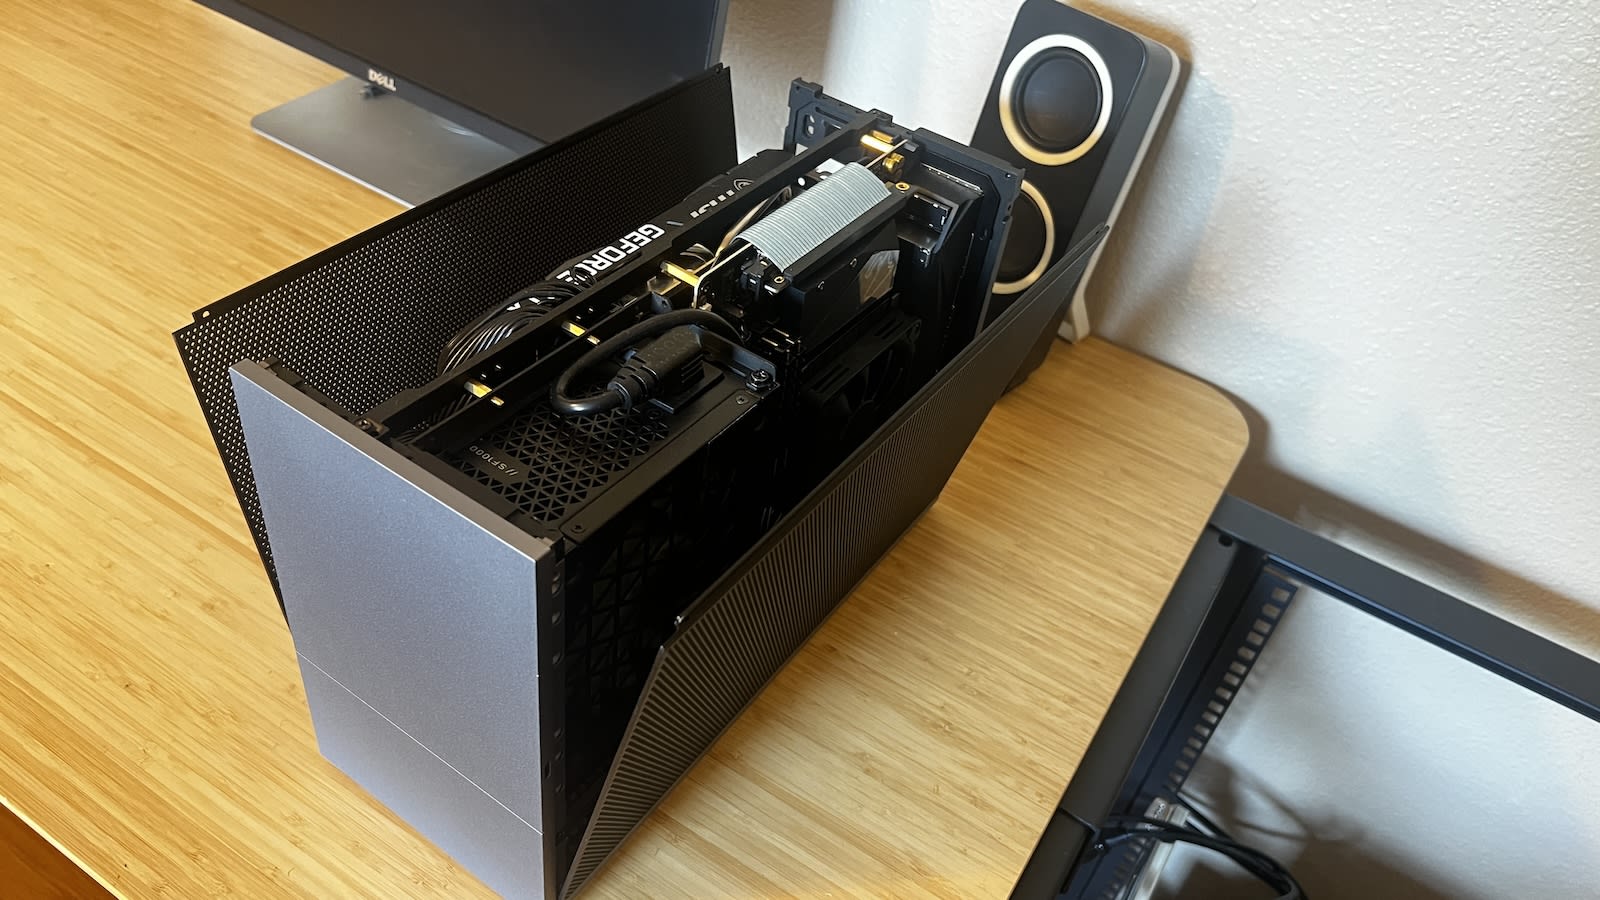
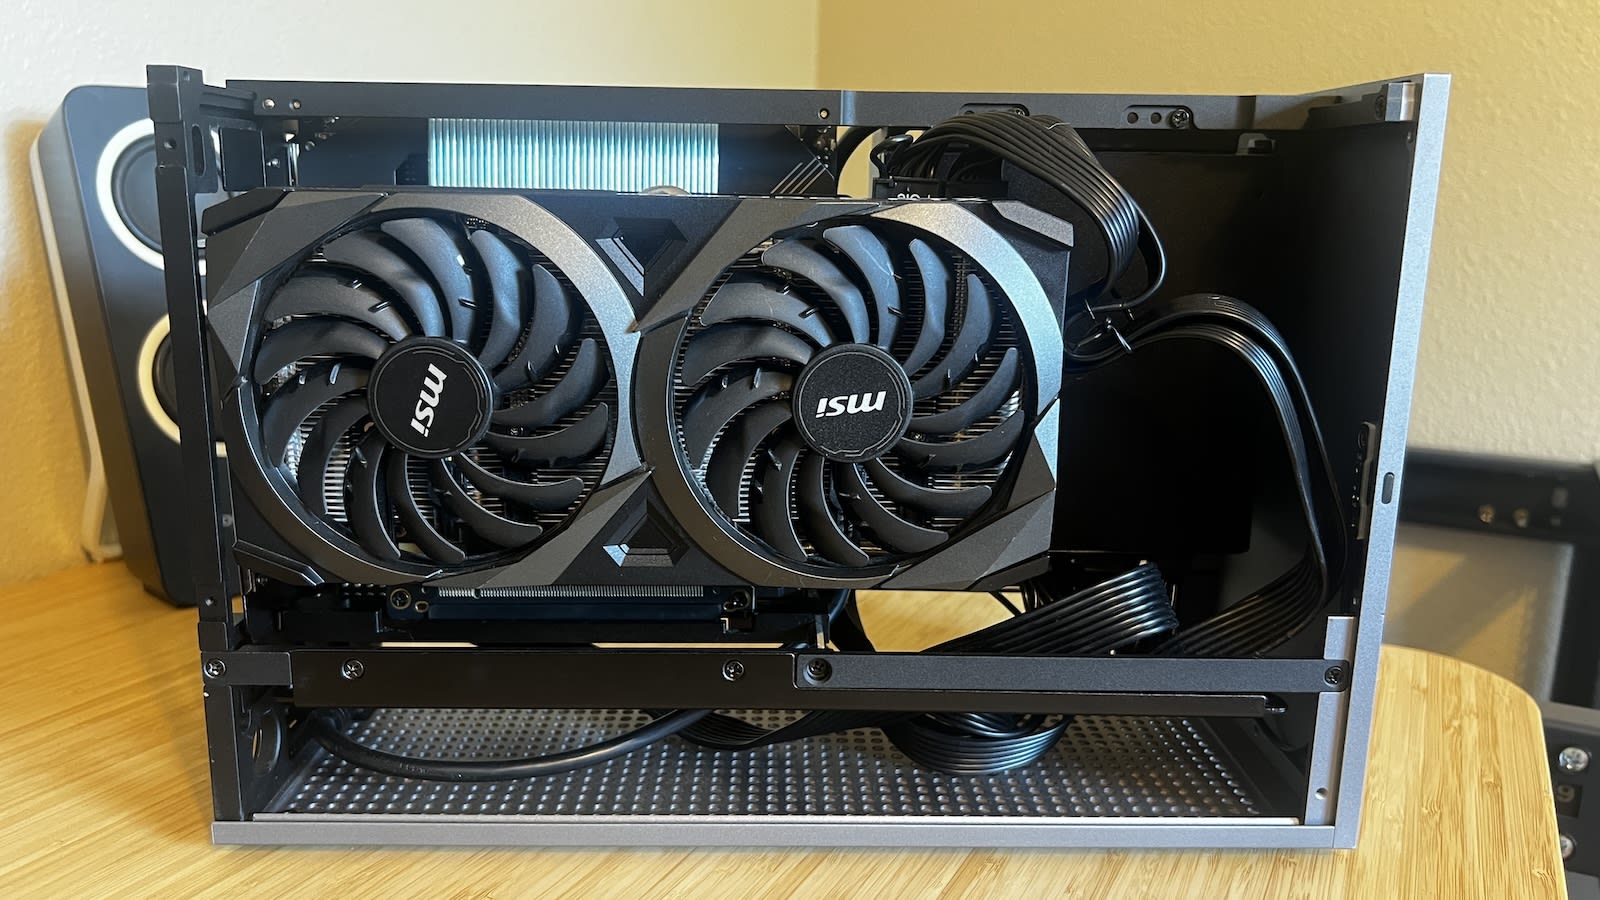
While this machine is primarily my personal gaming rig, I often use it for coding,
light testing, or experiments that require a GPU. I intentionally avoided turning this
into a server because I wanted to keep it dedicated to desktop use — and Windows
Hyper-V
isn’t ideal for the kind of virtualization and workflows I wanted to learn.
Where this machine really shines is in desktop virtualization — perfect for safely spinning
up isolated environments for experimentation. For example, when I got curious about how
game bots work, I created a Windows VM in
Hyper-V
and connected it to Mullvad VPN. That gave it an IP address
separate from my main system, letting me experiment with RuneScape bot development
without risking my home IP

When I need a smoother VM experience with full GPU passthrough, I boot into an Ubuntu
dual-boot partition. This also gives me a full Linux environment when I want to go beyond
what WSL on Windows can offer.
MacBook Air (On-the-Go Dev)
- Model: M1, 8GB RAM, 256GB SSD

This is my portable dev environment. I use it to write code, manage infrastructure remotely,
and connect to my homelab via Tailscale. It's perfect for
writing code, connecting to VMs via SSH, or doing lightweight frontend work when I’m away
from home.
Wrapping Up
This homelab has become more than just a personal dev environment — it’s my testbed, sandbox,
and launchpad for everything I build. Whether I’m automating
CI/CD pipelines, experimenting with infrastructure tools, or just spinning up a VM to try something new,
this setup gives me the flexibility and control I need to learn by doing.
Whether you're just getting started with your homelab or already deep in the weeds — I hope this breakdown gave you some ideas, or at the very least, a peek into how I’ve pieced mine together.